Yii2でGmailやYahooメールを受信するコンポーネントを作成してみました。
注意事項
PHP IMAP関数が有効である必要があります。
コンポーネントの開発
ディレクトリ・ファイルの作成
アプリケーションディレクトリ内にcomponentsディレクトリを作成します。
次にそのディレクトリの中にMailFetcherComponent.phpのファイルを次の内容で作成します。
ファイルの作成
<?php

namespace app\components;

use Yii;
use yii\base\Component;
use yii\base\Exception;

class MailFetcherComponent extends Component
{
    // Kind ( SMTP / IMAP / POP3 ).
    public $kind;

    // Mail server.
    public $host;

    // Connect post.
    public $port;

    // Account user.
    public $username;

    // Account password.
    public $password;

    // Encrypt type ( PLAIN / LOGIN / CRAM-MD5 ).
    public $encryption;

    // Target mail folder.
    public $mailboxFolder = 'INBOX';

    // Seaving server directoy for attachments.
    public $attachmentPath = false;

    protected $inbox;

    public function init()
    {
        parent::init();

        if (!$this->host || !$this->username || !$this->password) {
            throw  new \Exception("メールサーバの情報が不足しています。");
        }

    }

    public function connectOpen($args = [])
    {
        $labels = [ 'kind', 'host', 'port',
                    'encryption', 'mailboxFolder'];

        $connectSource = "{{host}:{port}/{kind}/{encryption}}{mailboxFolder}";

        foreach ($labels as $label){
            if (isset($args[$label])) {
                $this->$label = $args[$label];
            }
            if (in_array($label, ['username', 'password'])) continue;

            $val = $label == 'mailboxFolder' ?
                    strtoupper($this->$label) :
                    strtolower($this->$label);

            $connectSource = str_replace('{'.$label.'}', $val, $connectSource);
        }

        $this->inbox = imap_open($connectSource, $this->username, $this->password);

        if (!$this->inbox) {
            echo "IMAP接続に失敗しました: " . imap_last_error();
            return;
        }

        if (!$this->attachmentPath) {
            $this->attachmentPath = Yii::getAlias('@runtime/mail_attachments');
        }

        if (!is_dir($this->attachmentPath)) {
            mkdir($this->attachmentPath, 0777, true);
        }
    }

    public function fetchMails($searchCriteria = 'ALL')
    {
        $sources = [];

        $emails = imap_search($this->inbox, $searchCriteria);

        if ($emails)
        {
            rsort($emails); // 最新のメールが最初に表示されるようにソート

            foreach ($emails as $emailNumber)
            {
                $overview = imap_fetch_overview($this->inbox, $emailNumber, 0);

                // サブジェクトのデコード
                $subject = $this->mimeDecode($overview[0]->subject);

                // 差出人のデコード
                $from = $this->mimeDecode($overview[0]->from);

                $structure = imap_fetchstructure($this->inbox, $emailNumber);
                $message = '';


                if ($structure->type == 1) { // マルチパートメールの場合

                    $attachments = array();
                    foreach ($structure->parts as $partNumber => $part) {
                        if ($part->subtype == 'PLAIN') {
                            $message = imap_fetchbody($this->inbox, $emailNumber, $partNumber + 1);

                            if ($part->encoding == 3) { // BASE64
                                $message = base64_decode($message);
                            } elseif ($part->encoding == 4) { // QUOTED-PRINTABLE
                                $message = quoted_printable_decode($message);
                            }
                            break;
                        }

                        // 添付ファイルの取得
                        if (isset($part->disposition) && strtolower($part->disposition) == 'attachment') {
                            $attachment = imap_fetchbody($this->inbox, $emailNumber, $partNumber + 1);

                            if ($part->encoding == 3) { // BASE64
                                $attachment = base64_decode($attachment);
                            } elseif ($part->encoding == 4) { // QUOTED-PRINTABLE
                                $attachment = quoted_printable_decode($attachment);
                            }

                            $filename = 'attachment_' . time() . '_' . ($part->dparameters[0]->value ?? 'unknown');
                            file_put_contents($this->attachmentPath . '/' . $filename, $attachment);
                            $attachments[] = $this->attachmentPath . '/' . $filename;
                            echo "添付ファイルを保存しました: " . $filename . "\n";
                        }
                    }
                } else { // 単一パートメールの場合
                    $message = imap_fetchbody($this->inbox, $emailNumber, 1);

                    // エンコードの処理
                    if ($structure->encoding == 3) { // BASE64
                        $message = base64_decode($message);
                    } elseif ($structure->encoding == 4) { // QUOTED-PRINTABLE
                        $message = quoted_printable_decode($message);
                    }
                }

                $sources[$emailNumber] = [
                    'Subject' => $subject,
                    'From' => $from,
                    'Date' => $overview[0]->date,
                    'Message' => $message,
                ];
            }
        }

        imap_close($this->inbox);

        return $sources;
    }

    private function mimeDecode($str = '')
    {
        $encode_array = isset($str) ? imap_mime_header_decode($str) : [];
        $decoded      = '';
        foreach ($encode_array as $part) {
            $decoded .= $part->text;
        }

        return $decoded;
    }
}
使い方
設定
設定ファイル(config/web.php)に作成したMailFetcherコンポーネントを次のように追加します。
    'components' => [
        'mailFetcher' => [
            'class' => 'app\components\MailFetcherComponent',
            'kind' => 'IMAP',
            'host' => 'メールサーバホスト名',  // IMAPサーバーのホスト名
            'username' => 'アカウントユーザー名',
            'password' => 'パスワード',
            'port' => 'ポート',
            'encryption' => '暗号化タイプ',
            'mailboxFolder' => 'INBOX',  // デフォルトでINBOXを使用
        ],
上記の設定でコンポーネントをコントローラー上で実行できるようになります。
Yii::$app->mailFetcher;実行例
InboxController
InboxControllerを次のように作成します。
<?php

namespace app\controllers;

use Yii;
use app\models\Account;

class InboxController extends \yii\web\Controller
{
    public function actionIndex()
    {
        $receiver= Yii::$app->mailFetcher;

        $receiver->connectOpen();

        return $this->render('index', [
            'receiver' => $receiver->fetchMails('ALL'),
        ]);
    }
}
Viewファイル
/views/inbox/index.phpを次にように編集します。
<?php
/** @var yii\web\View $this */
?>
<h1>inbox/index</h1>

<p>
    You may change the content of this page by modifying
    the file <code><?= __FILE__; ?></code>.
</p>
<h2>Receiver Result</h2>

<?php foreach($receiver as $email): ?>

<div style="padding:1em;margin-bottom:3em;border:solid 3px #999;">
    <dl>
        <dt>Date</dt>
        <dd><?php echo $email['Date'] ?></dd>
        <dt>From</dt>
        <dd><?php echo $email['From'] ?></dd>
        <dt>Subject</dt>
        <dd><?php echo $email['Subject'] ?></dd>
        <dt>Message</dt>
        <dd><?php echo nl2br($email['Message']) ?></dd>
    </dl>
</div>
<?php endforeach; ?>
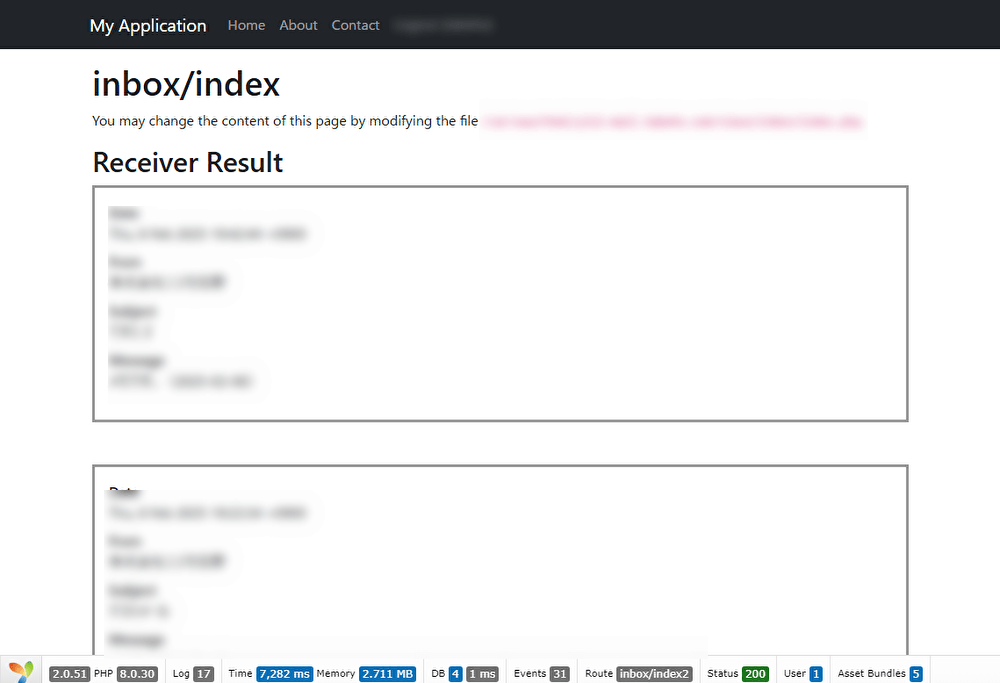
ブラウザで確認
次のURLへアクセスして確認します。
http://ホスト名/index.php?r=inbox/index
メールの受信ボックス情報が確認できれば成功です。


コメント