
Yii2のベーシックパックには標準でユーザ認証のサンプルがありますが、データベース管理ではなく簡易的な固定オブジェクトの為、商用利用に向かない仕様です。
ここではユーザ認証のサンプルを固定オブジェクトからデータベース管理に切り替える方法を説明します。
尚、Yii2のインストールがされていない場合は以下を参考してください。

データベーステーブルとモデルの作成
マイグレーションを使用してユーザ管理用データベーステーブルを用意します。
データベーステーブルの作成
マイグレーションファイルの作成
次のコマンドを実行してマイグレーションファイルを作成します。
# php yii migrate/create create_user_table --fields="username:string(32):notNull:unique,password:string(64):notNull,access_token:string(32),auth_key:string(32)"
Yii Migration Tool (based on Yii v2.0.51)

Create new migration '/var/www/html/yii2.takeho.com/migrations/m240806_073739_create_user_table.php'? (yes|no) [no]:yes
New migration created successfully.
#
コマンド実行後、migrationsのディレクトリの作成及びその中に以下のファイルが生成されます。
| 生成ファイル名 | m000000_000000_create_user_table.php |
<?php

use yii\db\Migration;

/**
 * Handles the creation of table `{{%user}}`.
 */
class m000000_000000_create_user_table extends Migration
{
    /**
     * {@inheritdoc}
     */
    public function safeUp()
    {
        $this->createTable('{{%user}}', [
            'id' => $this->primaryKey(),
            'username' => $this->string(32)->notNull()->unique(),
            'password' => $this->string(64)->notNull(),
            'access_token' => $this->string(32),
            'api_key' => $this->string(32),
        ]);
    }

    /**
     * {@inheritdoc}
     */
    public function safeDown()
    {
        $this->dropTable('{{%user}}');
    }
}
マイグレーションの反映
次の要領でコマンドを実行します。
# php yii migrate
Yii Migration Tool (based on Yii v2.0.51)

Creating migration history table "migration"...Done.
Total 1 new migration to be applied:
        m240806_073739_create_user_table

Apply the above migration? (yes|no) [no]:yes
*** applying m240806_073739_create_user_table
    > create table {{%user}} ... done (time: 0.006s)
*** applied m240806_073739_create_user_table (time: 0.012s)


1 migration was applied.

Migrated up successfully.
#
上記実行後、データベースにuserテーブルが作成されている事が確認できます。
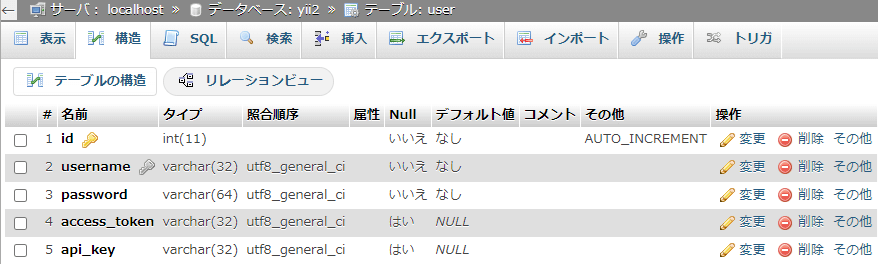
モデルの作成
モデルの作成にはYii2のGUI生成ツールGiiを仕様します。
モデル生成ページへアクセス
次のURLへアクセスします。
http://www.example.com/index.php?r=gii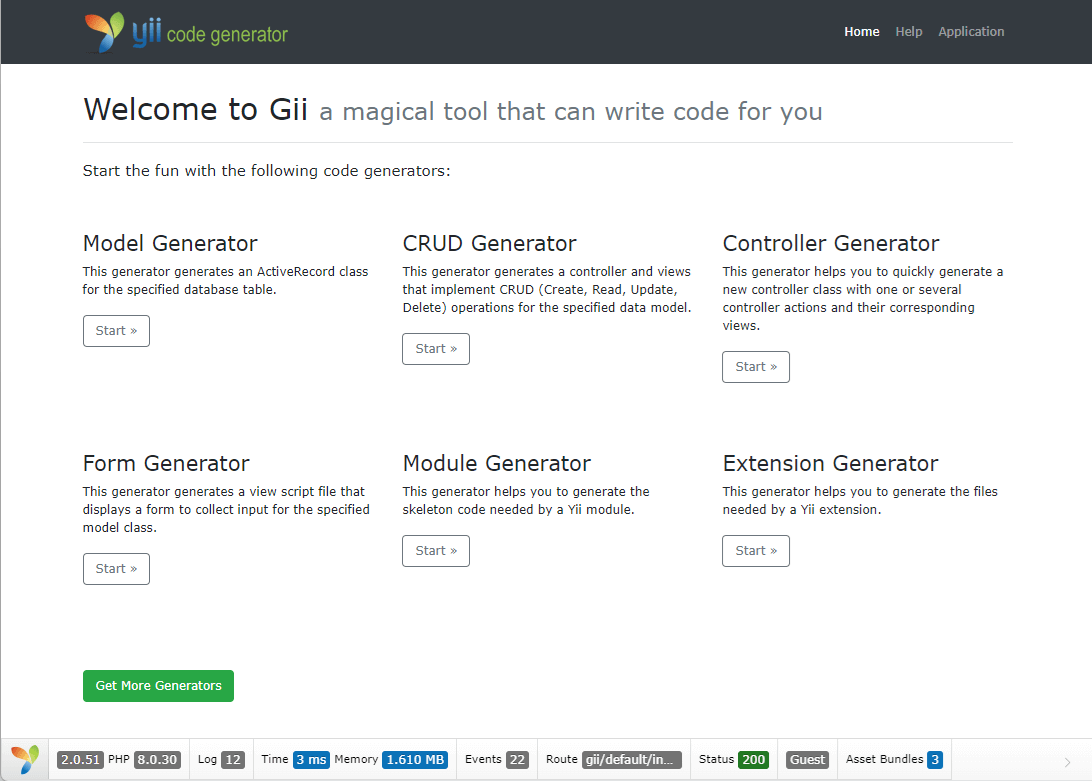
Model Generatorの項目にあるStartを押下します。
パラメータ設定
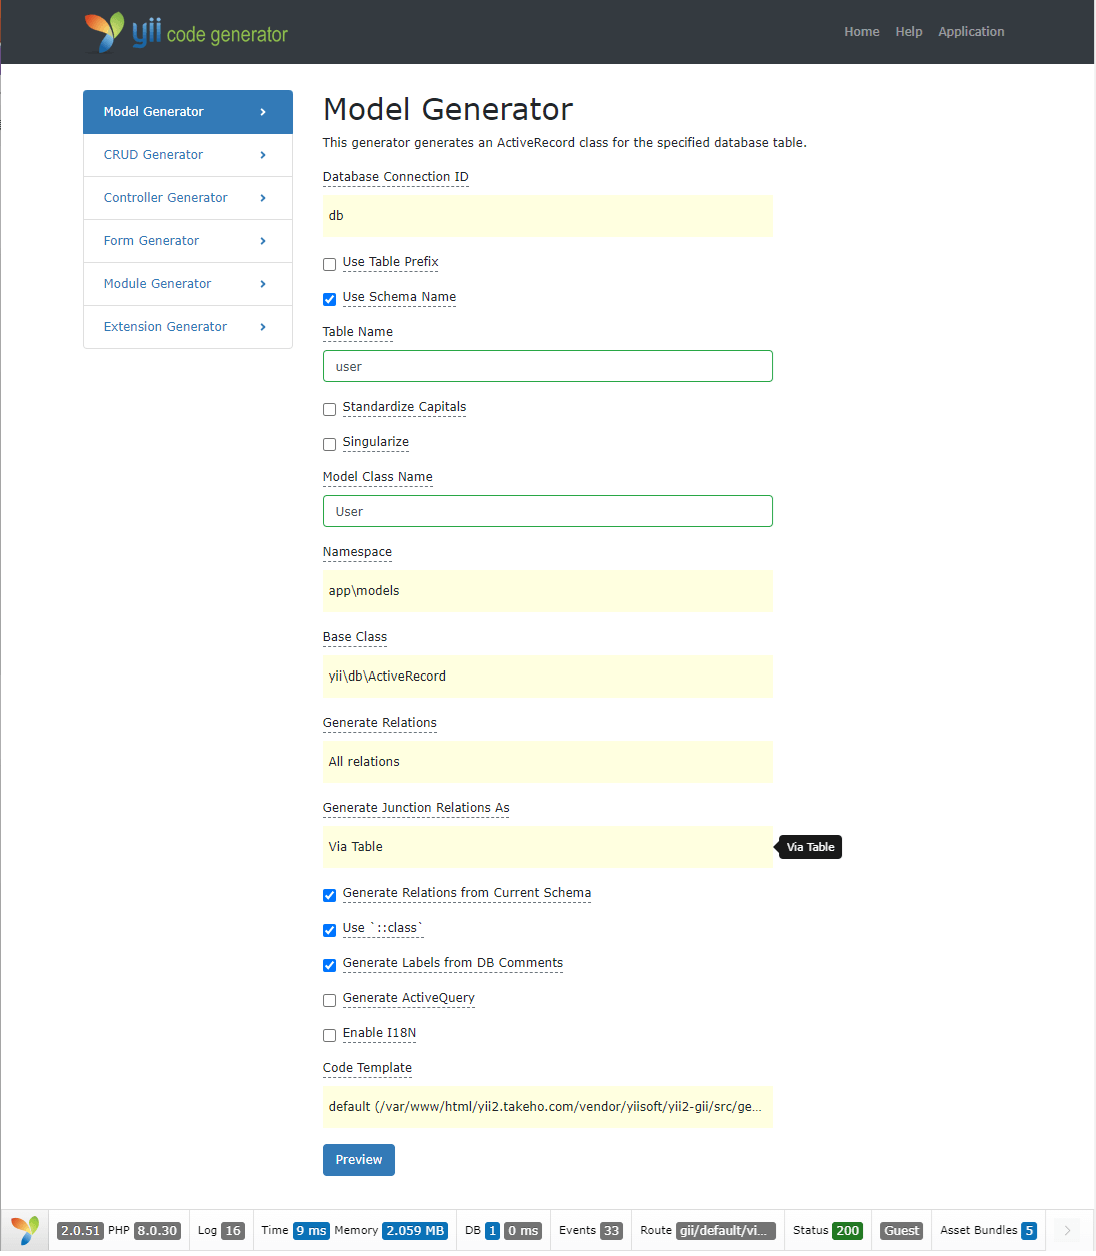
上記を参考に以下の情報を入力・設定し、Previewを押下します。
| Use Table Prefix | - |
| Use Schema Name | チェック |
| Table Name | user |
| Standardize Capitals | - |
| Singularize | - |
| Model Class Name | User |
| Generate Relations From Current Schema | チェック |
| Use ‘::class’ | チェック |
| Generate Labels From DB Comments | チェック |
| Generate ActiveQuery | - |
| Enable I18N | - |
確認画面(プレビュー)
Generateを押下します。
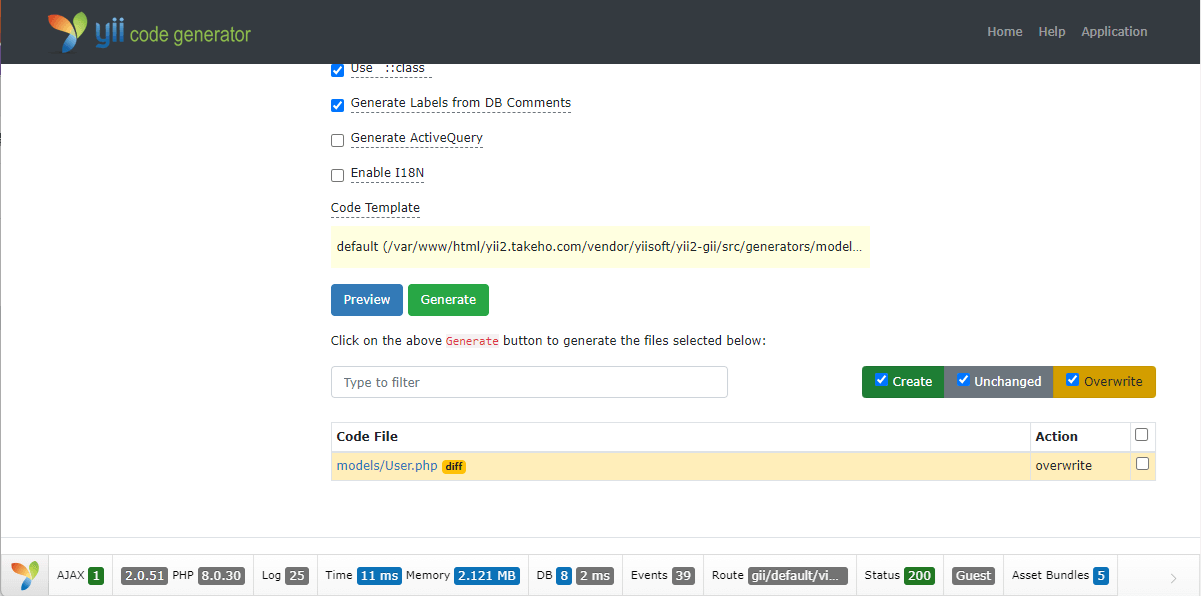
生成確認
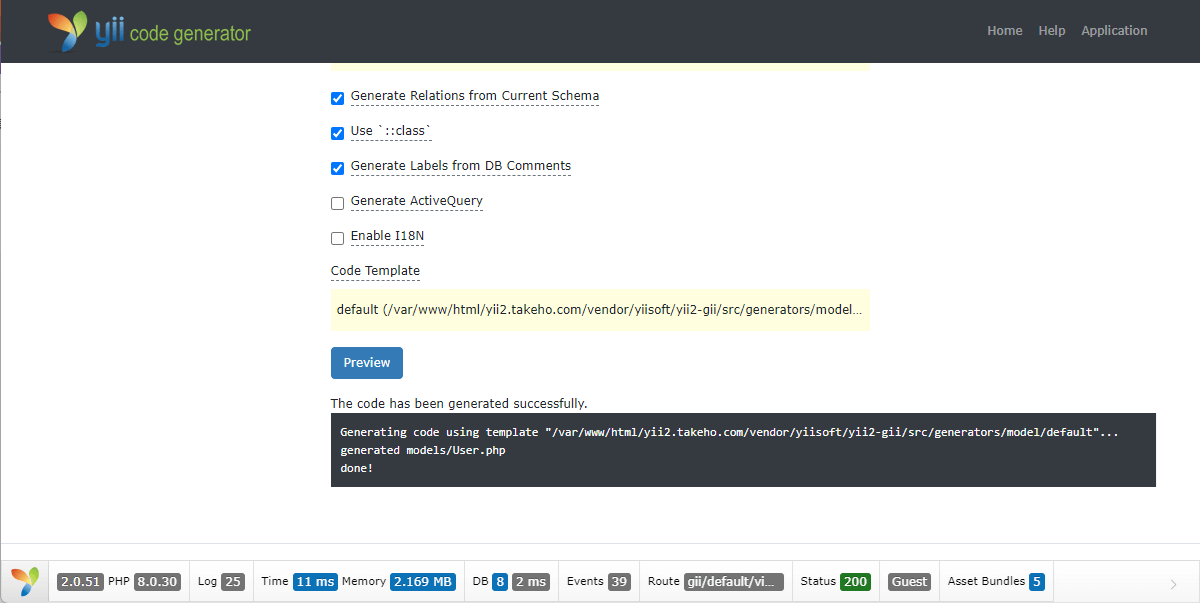
次のファイルが生成されているか確認します。
/models/User.phpCRUD(create、read、update、delete)機能の追加とデータの投入
モデルと同じ要領でGiiで以下のパラメータを指定してCURDを生成します。
| Model Class | User |
| Search Model Class | app\models\UserSearch |
| Controller Class | app\controllers\UserController |
| View Path | @app\views\user |
| Enable I18N | - |
| Enable Pjax | チェック |
動作確認
次のURLへアクセスしてCRUDが機能するか確認します。
http://www.example.com?r=user/index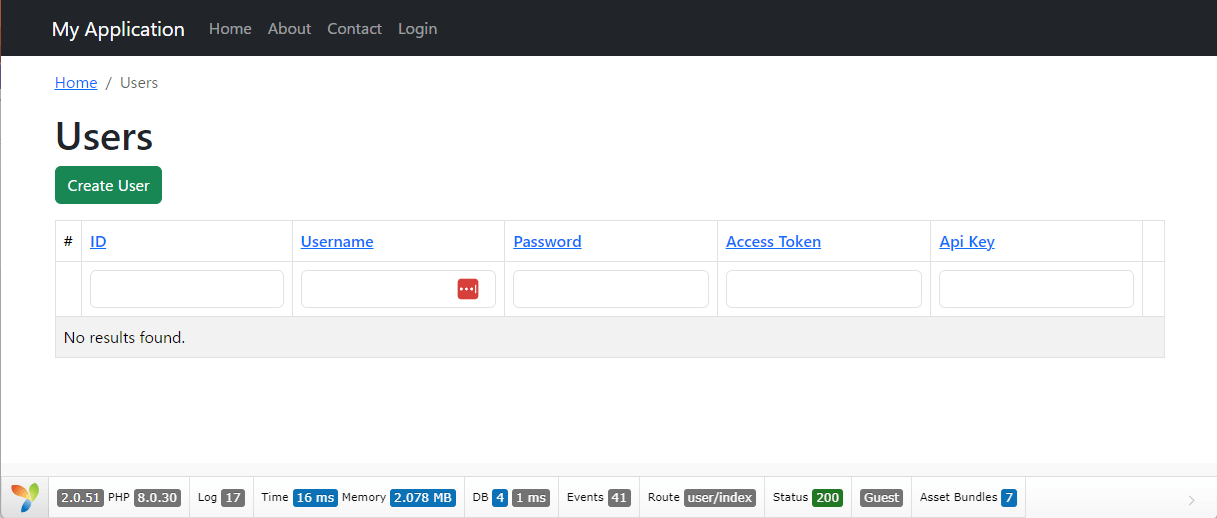
User登録フォームの改修
前頁で作成したUserのCURDには次の問題があるので修正を行います。
- Auth Keyの入力は不要だか新規登録時に自動で値が設定される必要がある
- Access Tokenの入力が不要
- パスワードが平文保存されている
Auth Keyの値を自動設定する
次のコードを参考にmodel/User.phpへbeforeSaveメソッドを追加します。
  public function beforeSave($insert)
  {
      if (parent::beforeSave($insert)) {
          if ($this->isNewRecord) {
              $this->auth_key = \Yii::$app->security->generateRandomString();
          }
          return true;
      }
      return false;
  }
上記より保存する前に新しいレコードの追加(insert)が確認の上、ランダムな文字列をauth_keyへセットします。
Auth KeyとAccess Tokenの入力を消す
Auth KeyとAccess Tokenは動的に生成する情報になり入力するべき項目ではありませんので、入力項目を消します。
| ファイル名 | /views/user/_form.php |
次の項目を削除します。
    <?= $form->field($model, 'access_token')->textInput(['maxlength' => true]) ?>

    <?= $form->field($model, 'auth_key')->textInput(['maxlength' => true]) ?>
パスワードの保存をハッシュ値に変更
次のコードを参考にmodel/User.phpのbeforeSaveメソッドを編集します。
    public function beforeSave($insert)
    {
        if (parent::beforeSave($insert)) {
            $this->password = Yii::$app->security->generatePasswordHash($this->password);
            if ($this->isNewRecord) {
                $this->auth_key = Yii::$app->security->generateRandomString();
            }
            return true;
        }
        return false;
}上記のように$this->passwordの値をセキュリティクラスからハッシュ値を求めた値に設定します。
認証インターフェイスの環境を整える
認証インターフェイスの利用に必須となる次のメソッドをUserモデルに追加します。
    public static function findIdentity($id)
    {
      return static::findOne($id);
    }

    public static function findIdentityByAccessToken($token, $type = null)
    {
      return static::findOne(['access_token' => $token]);
    }

    public static function findByUsername($username)
    {
      return static::findOne(['username' => $username]);
    }

    public function getId()
    {
      return $this->id;
    }

    public function getAuthKey()
    {
      return $this->auth_key;
    }

    public function validateAuthKey($authKey)
    {
      return $this->getAuthKey() === $authKey;
    }

    public function validatePassword($password)
    {
      return Yii::$app->getSecurity()->validatePassword($password, $this->password);
    }
アクセス確認
次のURLへアクセスして認証確認を行います。
http://www.example.com/index.php?r=site/login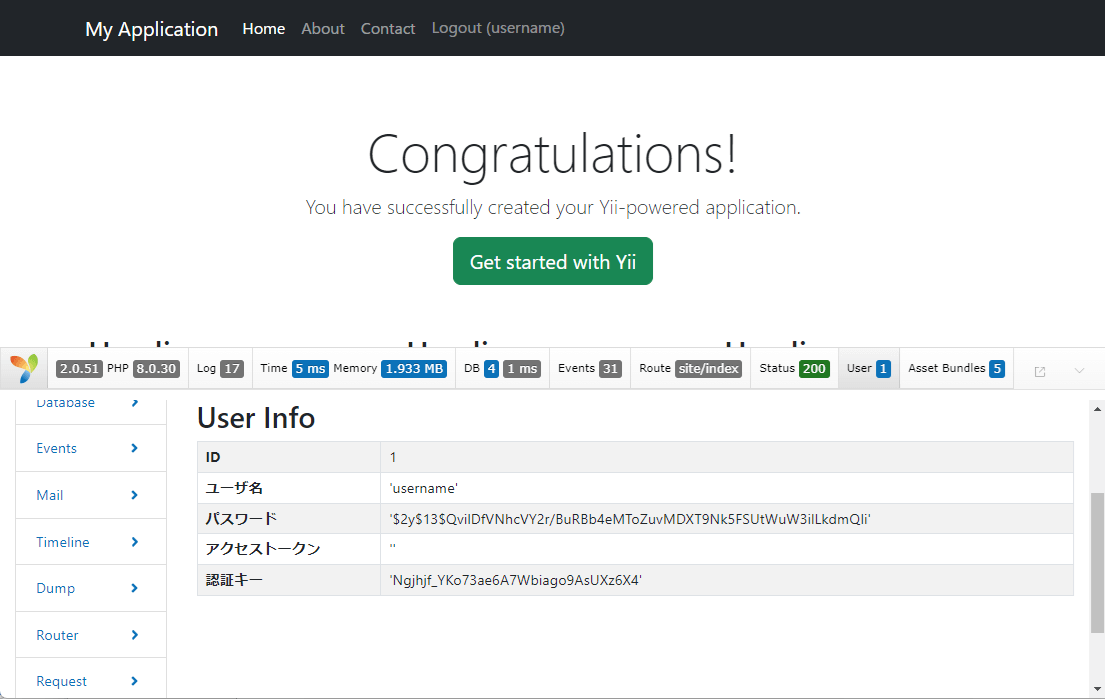
ログインに成功したらデバックツールバーのUserを押下して認証されている情報を確認できます。


コメント